A Gentle Routine for Cleaning Finished Wood
Clean finished wood with a light touch: remove loose dust, use a barely damp cloth only when needed, and dry the surface promptly.
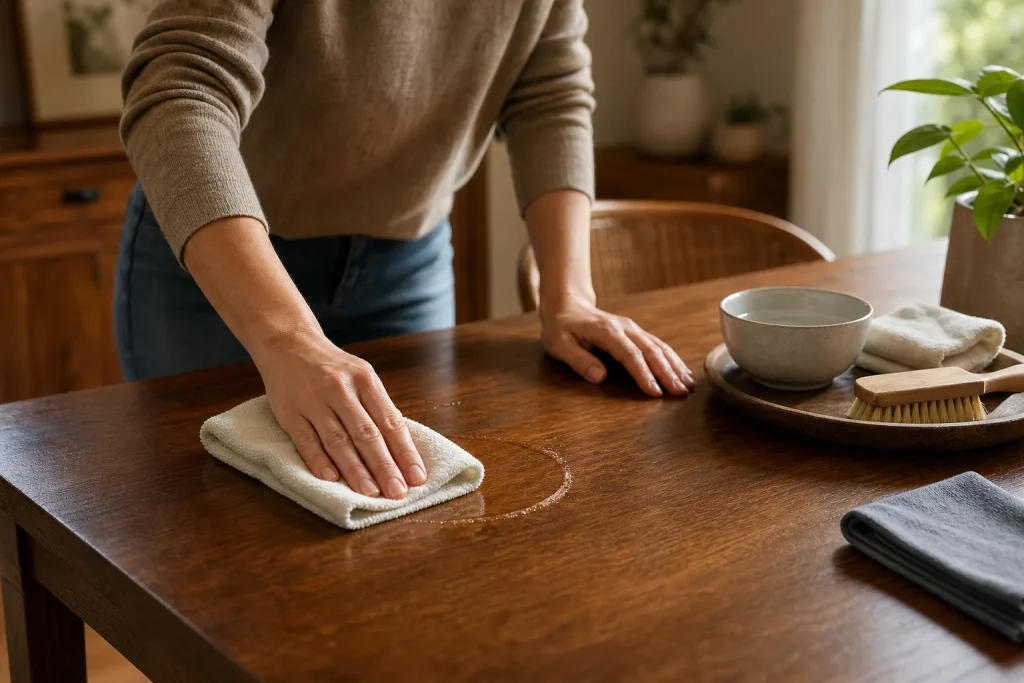
A ring of dried tea on a dining table can look stubborn, but reaching for a strong spray may create a bigger problem than the mark. Finished wood needs cleaning that suits its protective coating: begin with the least aggressive method, keep liquid under control, and stop when the surface is clean. This routine may suit many sealed, lacquered, painted, or otherwise finished household pieces, but finishes vary. If you do not know what finish is on an item, treat it as delicate and follow its maker’s care instructions.
Gather gentle supplies and check the care instructions
Before you start, collect a clean, soft microfiber or lint-free cotton cloth, a second dry cloth, and, if needed, a small bowl of lukewarm water. Keep a soft-bristled brush nearby for dust in crevices. Mild dish soap may help with greasy fingerprints, but use only a small amount diluted in water and only if the care instructions allow it.
Set aside abrasive pads, scouring powder, stiff brushes, shedding paper towels, and products containing strong solvents or bleach. Avoid general-purpose cleaners unless the label explicitly says they suit the furniture’s finish. Furniture polish and wax are not cleaning necessities; they may leave residue or change the sheen. Use them only when the maker recommends them and you know they are compatible with the existing surface.
Work in a comfortable, well-lit spot, away from direct sun or nearby heat sources. Keep the area clear so you can inspect the surface as you go. Move cups, books, lamps, and decorative objects onto a stable surface rather than dragging them across the wood.
Inspect the finish and remove loose dust
Look over the surface before cleaning. Note cracks, lifting edges, cloudy patches, worn-through areas, or exposed bare wood. These spots may react differently to moisture or cleaning products. If the finish is flaking, tacky, or damaged, do not wet-clean that area; ask the maker or a furniture-care professional how to proceed.
If the surface appears intact, remove loose dust with a dry microfiber cloth, following the grain where it is visible. Use light pressure. For carved details, corners, and edges around hardware, lift dust with a soft brush instead of forcing a cloth into narrow gaps.
Work from one area to the next, turning or refolding the cloth as it collects dust. If it becomes visibly dirty, replace it or wash it before continuing. A cloth carrying grit, crumbs, or household debris can scratch a finish, even when the fabric feels soft.
Try dry cleaning before adding moisture
For routine dust and light marks, a dry cloth may be enough. Wipe gently and inspect the surface in good light. If a fingerprint or dried splash remains, use a barely damp section of cloth rather than spraying the furniture. Direct spraying makes it harder to control where liquid lands, particularly near seams, joints, veneer edges, or fittings.
To dampen a cloth, wet a corner and wring it out thoroughly. It should feel barely moist, with no drops falling when squeezed. Touch it first to an inconspicuous area, such as the back edge of a table or the underside of a shelf. Wipe a small patch and dry it promptly. If the finish becomes cloudy, sticky, discolored, or unusually dull, stop using moisture.
If the test area looks unchanged after drying, make a gentle pass over the mark, following the grain where visible. Wipe the area dry at once with a separate cloth. Work on a small section at a time, and do not leave a wet cloth on the surface or let water collect around joints, handles, or tabletop edges.
Use diluted soap only when needed
If a greasy fingerprint remains after a barely damp-cloth pass, consider a small amount of mild dish soap diluted in lukewarm water. The solution should be only slightly soapy, not foamy. Check the furniture’s care instructions first; if they prohibit water or household soap, follow those directions.
Dampen a clean cloth with the solution and wring it until nearly dry. Wipe only the affected area with light pressure. Avoid repeated scrubbing, which may wear the finish or spread residue. Then use another cloth, barely dampened with plain water, to remove soap residue, followed immediately by a dry cloth.
Do not use this method on unfinished wood, a visibly damaged finish, or a surface that reacts badly to a discreet test. If a mark does not lift with a gentle pass, leave it rather than escalating to a stronger chemical or abrasive. Some marks have penetrated the finish or altered it; ordinary cleaning may not reverse that change.
Dry the surface and decide what to do next
Run a clean, dry cloth over the area, including seams and edges. Inspect the surface from more than one angle and feel gently for residue. A streak may be leftover soap; cloudiness or tackiness may indicate a reaction. If the finish changes, stop using liquids and contact the furniture maker or a qualified furniture conservator, especially for valuable or antique pieces.
Let the surface air-dry before returning objects. Avoid using a hair dryer, heater, or direct sunlight to speed drying; follow the maker’s care directions if available. Once dry, set items down gently. Felt pads beneath small objects can reduce scuffing, while coasters and placemats can help limit spills and marks.
Adapt the routine to the object
Finished wood is not a single, uniform surface. A modern table with a durable clear coating may tolerate a carefully wrung cloth, while an older cabinet with a fragile or uncertain finish may need dry dusting only. The maker’s instructions and the object’s visible condition matter more than a generic cleaning rule.
For frequently handled surfaces, attend to small spills with a soft cloth rather than letting them dry into a sticky patch. Shelves and side tables may need only regular dry dusting. Avoid leaving wet planters, cold glasses, or damp cleaning tools on wood. If condensation or a spill occurs, blot it promptly instead of rubbing it across the surface.
Keep cleaning products away from the wood while you work. Apply a product to the cloth only when its label calls for that approach, and never mix cleaners. If the item is a rental, heirloom, or part of a matching set, check with its owner or maker before using a new product. When the finish is uncertain, choose dry dusting and seek specific advice rather than experimenting on a visible area.
Follow a simple decision check before each cleaning pass
- Check the care label or maker’s instructions. If they name an approved method, follow it; if they prohibit a cleaner or moisture, use dry dusting or ask the maker for guidance.
- Check for flaking, tackiness, cracks, or exposed wood. If any are present, avoid wet cleaning that area; if the surface appears intact, proceed to dry dusting.
- Check the cloth for grit, crumbs, or visible dirt. If it is dirty, refold to a clean section or replace it; if it is clean, use light pressure to remove dust.
- Check whether the mark remains after dry wiping. If it is gone, stop; if it remains, consider a barely damp cloth only when the care instructions permit it.
- Check the damp cloth before touching the furniture. If drops fall when it is squeezed, wring it out more; if it is barely moist, test a hidden area first.
- Check the test patch after it has been dried. If the finish looks or feels different, stop and seek qualified advice; if it seems unchanged, gently clean a small part of the mark and dry it promptly.
- Check for greasy residue after a plain damp-cloth pass. If it remains and the care instructions allow soap, use a small amount of diluted mild dish soap; if they do not, avoid soap and ask the maker what to use.
- Check the surface after the final dry wipe. If it is clean and unchanged, let it air-dry before replacing objects; if it is cloudy, tacky, or discolored, stop and contact the maker or a furniture-care professional.
Worked hypothetical example: a sticky dining-table mark
Imagine a finished dining table with a small dried patch of sweet tea near the edge. The coating looks intact, but the care label is unavailable. The goal is to remove surface residue without sending moisture into the edge seam. First, move nearby objects and brush away crumbs. Next, wipe the patch with a clean, dry microfiber cloth. If stickiness remains, dampen a cloth corner with lukewarm water and wring it until no drops come out. Test a discreet spot on the underside, then dry it. If that spot looks and feels unchanged, make one gentle pass over the mark, keeping the cloth away from the seam, and wipe the area dry immediately. Inspect it in good light. If the sticky residue is gone and the finish appears unchanged, stop; if the mark remains or the finish changes, do not escalate to stronger treatment. Leave the area alone and seek advice from the maker or a qualified furniture-care professional.
Know when to stop
Cleaning is not the same as refinishing. A dull patch, heat mark, scratch, or stain beneath the coating may not respond to ordinary wiping. Repeated passes, abrasive rubbing, and improvised solvent treatments can enlarge the damaged area. Stop if gentle cleaning has no effect, the finish changes, or the surface feels soft or sticky afterward.
For an unfamiliar or valuable piece, ask the manufacturer, a reputable furniture restorer, or a qualified conservator before applying a specialized product. Describe the finish if known, the mark, and any reaction you observed during a small test. Until you receive advice, keep the area dry and protect it from further spills. A light cleaning routine and a timely stop can help avoid turning a minor mark into a repair.